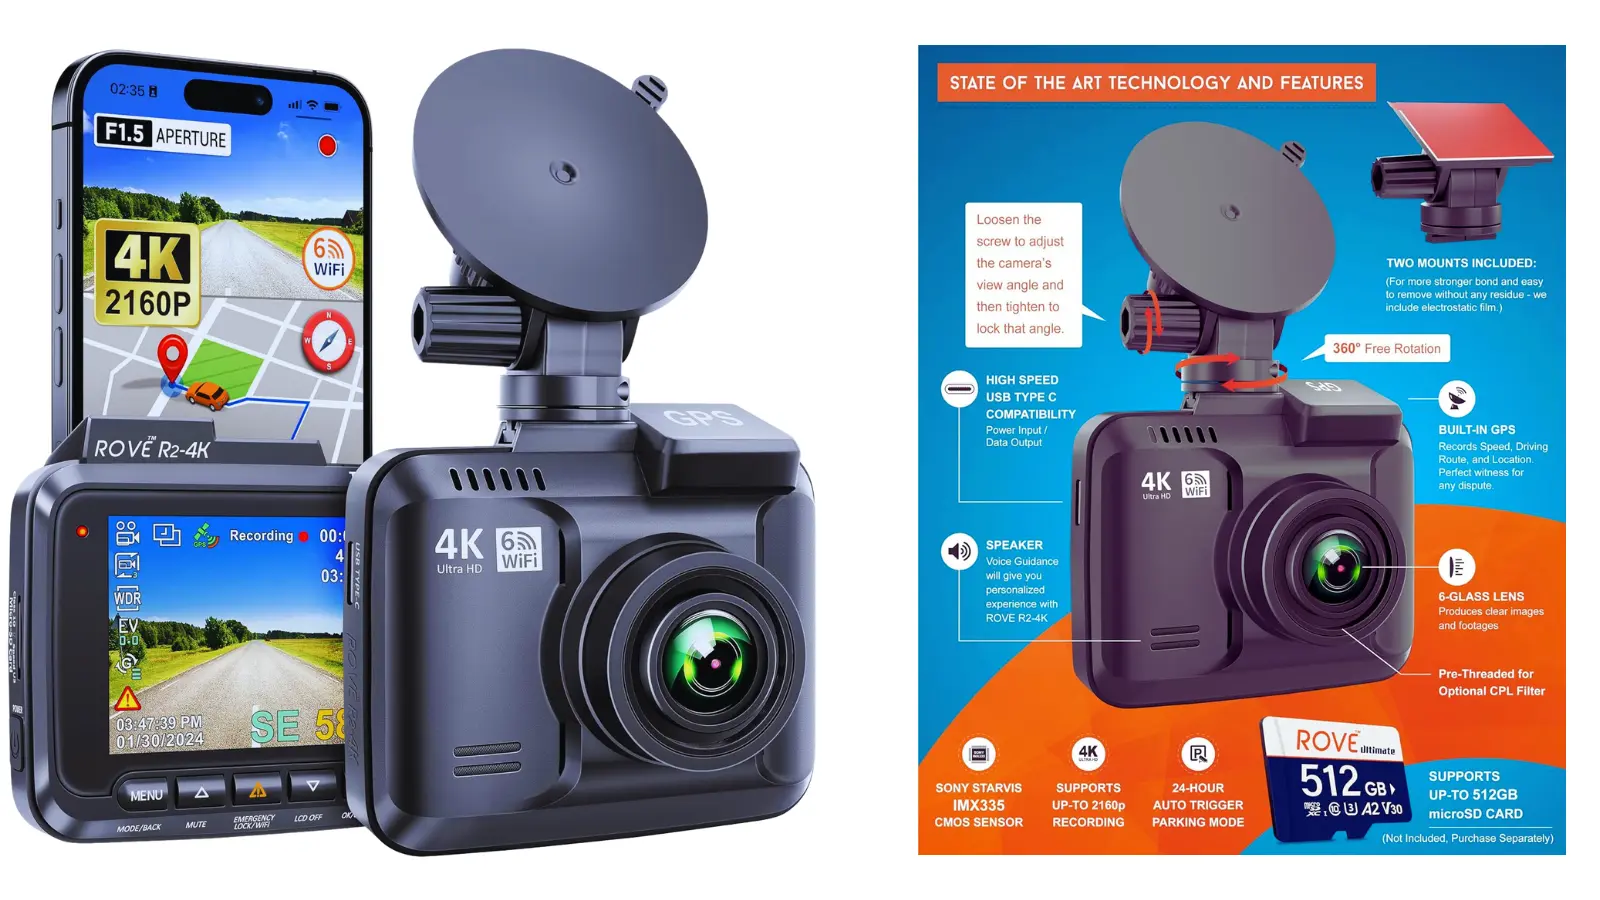
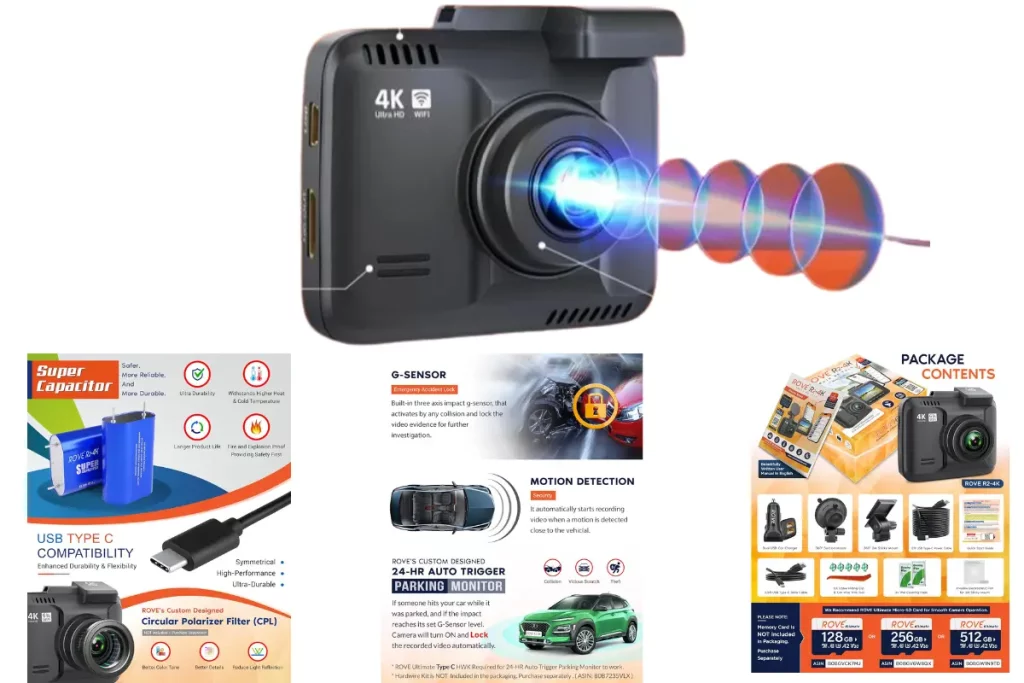
This article is from the Automotivean website to learn how to install Rove r2-4k dash cam.
Dash cams have become an essential accessory for drivers looking to improve their on-road safety and security.
Among the many dash cam options available in the market. The Rove R2-4K renowned for its high-quality video recording capacities and features.
This guide teaches you how to install your vehicle’s Rove R2-4K dash cam.
Ensuring you can capture crisp, explicit footage of your journeys.
Step-by-Step Guide to Installing the Rove R2-4K Dash Cam
1. Unboxing and Familiarizing Yourself with the Rove R2-4K Dash Cam
The first step in installing your Rove R2-4K dash cam is to unbox the device and familiarize yourself with its material.
The box typically has a dash cam unit, a windshield mount, a car charger, a USB cable, and a user manual.
Take a moment to read through the manual to understand the various settings and features of the dash cam.
2. Mounting the Dash Cam on Your Windshield
To install the Rove R2-4K dash cam on your windshield and attach the windshield mount to the camera unit.
Choose a suitable area on your windshield that offers a free view of the road ahead.
Clean the chosen spot with a microfiber cloth to ensure a secure attachment.
Peel off the protective film on the sticky side of the mount.
Now press it firmly against the windshield for a few seconds to secure it in place.
3. Connecting the Power Supply- Installing Rove R2-4K Dash Cam
Plug the charger into your vehicle’s power outlet (cigarette lighter socket) and connect the USB cable to the dash cam.
Route the cable along the windshield’s edge and down the dashboard’s side to conceal it from view.
Secure any excess cable with clips or tape to keep it tidy and prevent it from dangling in your line of sight.
4. Adjust the Camera Angle and Settings
Once the dash cam mounted securely and powered on.
Then, adjust the camera angle to ensure it captures the desired road view.
Use the swivel mount to tilt and rotate the camera until you achieve the optimal position.
Additionally, explore the settings menu on the dashcam to customize features. Such as resolution, loop record, parking mode, and motion detection to your preferences.
5. Testing the Dash Cam
Before the trip, test your Rove R2-4K dash cam’s function for ensure it is recording properly.
Check the video quality, audio recording, and any more features you have enabled.
You can also review the footage captured by the dash cam on the device’s screen.
Also, you can transfer it to a computer for further analysis.
Final word about Installing Rove R2-4K Dash Cam:
Follow these step-by-step guides, and you can easily install the Rove R2-4K dash cam in your vehicle.
After installing, enjoy the benefits of having a reliable eyewitness on the road.
Whether you want to capture scenic drives, check your surroundings for safety, or record events.
The Rove R2-4K dash cam is a valuable addition to your car, providing peace of mind and enhanced security.
Drive confidently, knowing that your journeys are being documented clearly and precisely.
FAQs for Rove R2-4K Dash Cam:
How do I connect my ROVE R2-4K to my phone?
To connect your ROVE R24K dash cam to your phone, will need to follow a few simple steps.
Firstly, ensure you have the ‘ROVE Dash Cam’ app downloaded and installed on your phone.
This app is available for iOS and Android devices and can be found on the App Store or Google Play Store.
Next, power on your ROVE R2-4K dash cam and enable the Wi-Fi connection.
This is usually done through the dash cam’s settings menu. Once the Wi-Fi is activated, open your phone’s ‘ROVE Dash Cam’ app.
You should see an option to connect to a device within the app. Select your ROVE R2-4K dash cam from the list of available devices.
The app will prompt you to enter the Wi-Fi password for the dash cam.
This password is usually provided in the user manual or found on a sticker on the dash cam itself.
Enter the password and wait for the app to connect with the dash cam.
Once the connection is successful, you can view the live feed from your ROVE R2-4K dash cam on your phone.
The app lets you access recorded footage, adjust settings, and download videos to your phone.
This wireless connection provides advantages and flexibility.
Also, allowing you to manage your dash cam effortlessly from your mobile device.
2. What is the app for ROVE R2-4 dash cam?
The app designed for use with the ROVE R2-4K dash cam called ‘ROVE Dash Cam.’
This app is suitable for iOS and Android devices and can downloaded from the App Store or Google Play Store.
The ‘ROVE Dash Cam’ app lets you connect your mobile device to your R2-4K dash cam via Wi-Fi.
This provides convenient access to live footage, recorded videos, and settings adjustments.
The ‘ROVE Dash Cam’ app lets you view real-time video feeds from your dash cam.
You can view and download footage, adjust camera settings, and manage recordings directly from a smartphone or tablet.
The app’s intuitive interface makes it easy to navigate and control your dash cam remotely.
It also offers features that improve your overall experience with the ROVE R2-4K dash cam.
Using the ‘ ROVE Dash Cam ‘ app, you can efficiently connect with your dash cam.
It ensures seamless operation and optimal performance while on the road.
3. How do I connect my Rove dash cam to my computer?
Connecting Rove dashcam to your PC allows you to access and transfer recorded clips for editing, storage, or sharing.
You must use the USB cable with your Rove dash cam to establish this connection.
First, power on your dash cam and connect one end of the USB cable to the dash cam’s port.
Next, plug the other end of the USB cable into an available USB port on your computer.
Your computer should identify the dashcam as an external storage device and access its files.
You can then navigate via the dash cam’s folders to locate and transfer video recordings to your PC.
Once the transfer is done, you can review, edit, and save the footage on your PC for future reference.
This direct connection with your Rove dash cam and computer simplifies the process of managing your recordings.
You can easily store and arrange your footage for personal or professional use.
4. Can I install a dashcam by myself?
Yes, installing a cam by yourself is a simple process that does not need professional help.
Most cam models, including the Rove R2-4K, have detailed installation instructions.
It also comes with mounting accessories that make it easy for users to set up the device independently.
To install a dashcam by yourself, choose a suitable area on your windshield that has free view of the road ahead.
Clean the chosen area and attach the dashcam mount using the tools or suction cup provided.
Next, connect the power cable to the vehicle’s power outlet and confirm a tidy cable to avoid barrier.
Follow the guide to set up more features, such as motion detection or parking mode.
Adjust the camera angle for optimal recording once the dashcam mounted and connected.
By following step-by-step instructions given with your dashcam or referring to online resources.
You can install the device and enjoy improved safety and security while on the road.
5. How to mount a Rove dash cam?
Mounting a Rove dash cam is a simple process that can complete following a few key steps.
Before starting, ensure you have the tools with your Rove dash cam, including the mount and adhesive/suction cup.
- Mounting location: Select a fit area on your windshield that supplies a free road view.
Avoid placing the dash cam in areas that obstruct your visibility while driving.
- Clean the mounting surface: Clean the selected area on the windshield with a glass cleaner to remove any dirt, dust, or residue.
A clean surface will help the adhesive or suction cup attach securely.
- Attach the mount: Rely on the type of mount given with your Rove dash cam, and attach it to the cleaned area.
Remove the protective film for sticky mounts and press the mount firmly onto the windshield for a few seconds.
For suction cup mounts, moisten the cup slightly and press it against the windshield.
Then, engage the suction mechanism to secure it.
- Install the dash cam: Once the mount is securely attached, slide the Rove dash cam into the mount until it clicks into place.
Ensure the dash cam positioned at the desired angle for optimal recording.
- Adjust the camera angle: After mounting the dash cam, adjust the angle as needed to record the desired view.
Ensure the lens aligned to record the road view and any relevant such as license plates or road signs.
By following these steps and detailed instructions provided with your Rove dash cam.
You can easily mount the device on your windshield and start recording your journeys with ease.


